Showing posts with label gf breadcrumbs. Show all posts

13 January 2012

failed almond quick bread

This afternoon I decided to turn off Pinterest and actually make something I'd pinned. I hadn't had a sandwich in several months so I chose almond quick bread. I make sweet quick breads all the time and I liked the idea of not having to turn on KitchenAid mixers or bread machines in order to get a loaf of bread that could be used for savory sandwiches.

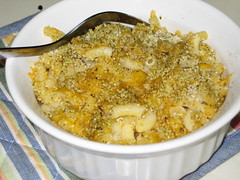
I failed on so many levels. I couldn't find tapioca starch so I used corn starch, wondering if it would be the same thing. I don't know if that's what went wrong or if it's because I used the wrong size pan (my own fault for not paying attention) in an oven that is wildly inaccurate. Even though my pan was well-greased, the loaf stuck. It wasn't burned, just browned and dry. The loaf is too narrow to make the chicken sandwich I was hoping for (due to the wrong size pan). I snacked on some of the crusty bits I was able to free from the bottom of the pan and they were pretty tasty.

Either we'll have French toast sticks for breakfast this weekend or I have a nice new batch of breadcrumbs.

You can't win them all.

04 January 2008

Mini mac & cheese casserole

When Mike saw this photo on my flickr page, he practically started drooling. Unfortunately for him, I made and ate them on the sly. Next time I'll share!

This is my way of sprucing up a boxed mac-n-cheese mix and creating a super-satisfying comfort meal. I usually buy the Annie's gluten-free macaroni and cheese, but it should work for just about any kind, gf or regular.

I prepared the mac and cheese per the package directions. I ate about 1 serving as is, then divided up the rest into 2 Corniware 16-oz dishes. I let them cool to room temperature, then lidded and put in the fridge.

When I was ready to bake one for lunch, I took it out of the fridge and topped with fresh-grated cheddar cheese and Gluten-Free Pantry's Herbed Bread Crumb Coating. I put it, uncovered, in a 350-degree oven for 15 to 20 minutes. Here's a trick--if you don't preheat the oven, you can put a casserole dish in cold from the fridge. Then it heats evenly and you don't have to worry about cold dish / hot oven disasters. (I learned that from an over-eager Le Creuset sales lady.) It takes a little longer to warm through, but with such a small dish the time is minimal.

The fresh cheddar and the bread crumbs melted then crisped together for a delicious crust. Eating this for lunch on a cold winter's day warmed me all over. It's not particularly healthy, but it's totally yummy.

08 December 2007

chiles rellenos

What do I do when Planet Organics drops four unexpected poblano (or pasilla) chiles on my doorstep because I wasn't paying careful enough attention to my produce order?

Chiles rellenos! I'd never had this at a restaurant because of the breading. But Mike loves these cheesy chiles, especially from one particular place that was our favorite Mexican restaurant in San Diego. So I set about figuring out a way to make them at home with my beautiful accidental poblanos. Between online searches and rifling through cookbooks I couldn't find anything that jived with Mike's memory of the specific chiles rellenos. But I figured out the basic idea and I used Joy of Cooking as my main guideline.

First I roasted the peppers. To roast in the oven, place them on a baking sheet and broil for a few minutes, turning two or three times for evenness. Make sure you use tongs for turning them; a fork might pierce the skin. They're done when the skin starts to blister and turn black. Once they're cool enough to handle, peel off the skins.

Then I came to my first impasse. How do I get the cheese in and the veins and seeds out? I wanted to bread them, which makes it difficult to make a long, lengthwise slice. None of the recipes I found made the chiles exactly the way I wanted them, so I had to wing this part. I made two slices near the stem, forming a T. I was able to get my paring knife into the T and with a little careful wriggling I cut out the bulk of the seeds near the base of the stem and most of the veins. After that, shoving in the cheese was a cinch.

I grated some Monterey Jack cheese to stuff the peppers. I also threw in some kidney beans. I couldn't come up with a good side dish, making the chiles rellenos the only course, so I wanted them to be slightly healthier than breaded cheese. Beans make a good filling because they are nonfat yet high in fiber and protein.

Phew. Next step, breading. Usually I recruit Mike for this job but being my first stab at chiles rellenos I wanted to have my hands on every step. It was surprisingly easy to handle the stuffed peppers. They are sturdy yet pliable. Dipping them in potato starch then in egg made a nice sticky paste that sealed the slices together quite nicely.

For bread crumbs I used Southern Homestyle Tortilla Crumbs. I had never even heard of tortilla crumbs, yet lo and behold, I found a new grocery store recently and they sold tortilla crumbs. Theoretically, you'd think they'd be the perfect breading for chiles rellenos.

I baked my breaded chiles in the oven at 350 degrees for 15 minutes. Since they're already roasted, they're soft enough to eat. You just need to get the cheese all warm and melty.

And boy were these warm and melty! The taste wasn't perfect and Mike and I have a few ideas for improvement. But lots of melted cheese heals all ills. (Except lactose intolerance I guess.) We deemed these chiles pretty good for a first effort. The breading wasn't quite as thick and crispy as we both like. Mike's the breading genius so I'll let him do it next time. And more flavor was needed in the stuffing. I'm thinking either garlic or green onions next time. Poblano chiles are mild, so if you want a little kick you need to add it. Maybe a bit of chopped serrano?

22 September 2007

eggplant with basil and feta

This recipe is inspired by the Crispy Eggplant with Spicy Tomato-Feta Cheese Sauce in the book Vegetarian Cooking for Today. We've modified it quite a bit for our tastes. It's the recipe that convinced Mike several years ago, after we both read Fast Food Nation, that it's not so bad to cut down on meats. It's also the recipe I wanted to make a couple weeks ago when I had an eggplant but ended up without basil.

eggplant
1 egg
small bit of milk
pototo starch
bread crumbs
tomato sauce
crushed red pepper
fresh basil
feta cheese

I got a medium eggplant from my Planet Organics delivery on Thursday. Peel it and slice it into rectangles, about 1 inch by 2 inch by 3 inch. Let the pieces sit on a plate, salted, for about 10 minutes to draw out some of the moisture. Pat dry with paper towels. Bread the pieces by dipping in potato starch, an egg-milk mixture, and finally bread crumbs. (I use Gluten-Free Pantry Herbed Crumb Coating. I hate the breading process--it seems to take forever. A little trick I have is to ask Mike to do it for me.) Place breaded pieces on a baking sheet and bake at 400 degrees for 25 to 30 minutes, until the outsides are crispy and the scent of herbed bread crumbs is intoxicating.

While the eggplant is baking, heat up some of your favorite store-bought or homemade tomato sauce in a small sauce pan, adding a pinch of crushed red pepper. Wash and pat dry some basil leaves. Sometimes I slice them into attractive little shreds. Get the pack of feta cheese from the fridge. Place eggplant pieces on plate, spoon sauce over them, then top with basil and crumbled feta.

It's a very satisfying meal, combining some of our favorite flavors. It's warm and filling for cool weather, but if you can get good fresh basil you have great summery flavor. And everything is better when it's topped with feta cheese.


This is my first entry for Weekend Herb Blogging. This is a weekly event that collects recipes for herbs and vegetables, sponsored by Kalyn's Kitchen. This week it's being hosted by Once Upon a Tart, so head over there on Monday to check out the weekly recap of recipes.

ShareThis

LinkWithin

Related Posts with Thumbnails